


 Cámara de fotos (patrón gratis)

Patrón en español (Cámara de fotos)
Puntos y abreviaturas
Todo la cámara se teje en punto bajo.
Cad.: Cadeneta
P.b.: Punto bajo
P.: Punto
Aum.: Aumento (dos puntos bajos juntos en el mismo punto)
Dism.: Disminución (un punto bajo juntando dos puntos bajos)
Rep.: Repetir
Punto raso
Tejer en las presillas traseras
Tejer en las presillas delanteras
Materiales
Lana o hilo de algodón de grosor medio.
Se necesitan dos colores:
- Blanco para la base y el borde
- Un color principal para la cámara
Fieltro negro y blanco (para hacer el objetivo)
Ganchillo acorde al hilo elegido
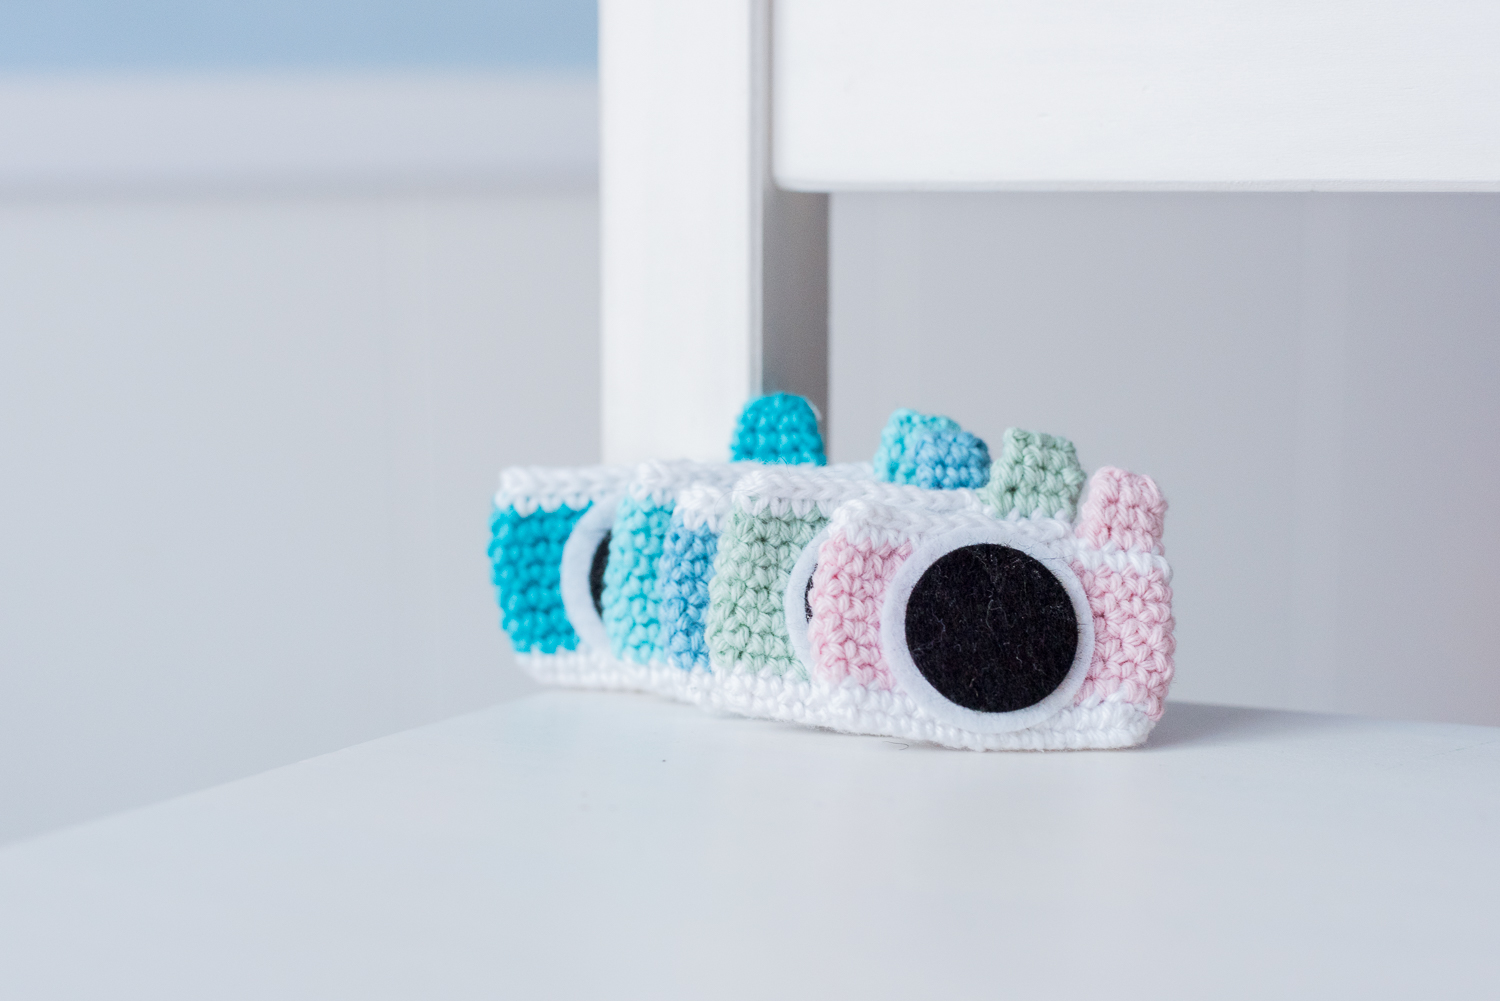
Cuerpo de la cámara de fotos
Con la aguja del tamaño adecuado y el color escogido para el ratón (por ejemplo azul):
Hacer un anillo mágico
Hacer un anillo mágico
Con el ganchillo adecuado y el hilo de color blanco,
Hacer 15 cadenetas sueltas
Saltar una cadeneta, 1pb en las presillas traseras de las siguientes 14 cadenetas,
- Girar la labor
- Hacer 1 pb en las presillas delanteras de las siguientes 14 cadenetas (las presillas delanteras que habíamos dejado libres antes),
En este punto tenemos un total de 28 puntos, y la labor ya dispuesta para trabajar en vueltas cerradas.
Hacemos 7 p.b. en los siguientes 7 puntos (tenemos el ganchillo situado en la mitad de lo que será el cuerpo de nuestra cámara de fotos)
CAMBIAR AL COLOR PRINCIPAL DE LA CÁMARA (por ejemplo azul)
Tejer 7 vueltas completas de p.b. (cuando acabamos las 7 vueltas seguimos en la mitad del cuerpo de la cámara)
CAMBIAR AL COLOR BLANCO
Tejer una vuelta en color blanco de p.b.
Tejer 3 p.b. más de manera que queden 4 puntos para llegar al borde.
La idea es dejar un hueco de 8 puntos libres donde tejeremos el flash de nuestra cámara. Esos 8 puntos son 4 del lado donde estamos ahora y 4 del otro lado.
Girar la labor (dejando a la derecha nuestro hueco de 8 puntos).
Unir los puntos de dos en dos, cada uno con su compañero de enfrente con puntos rasos, de manera que cerremos la cámara. Deberían ser necesarios 10 puntos rasos.
Rematar la labor y entretejer la hebra.
Orejas (hacer 2)
Con la aguja del tamaño adecuado y el color escogido para el ratón (por ejemplo azul):
Hacer un anillo mágico
1 vuelta: 5 p.b. en el anillo mágico
2 vuelta: [1 aumento] repetir hasta fin (10)
3 vuelta: 1 p.b. en cada punto (10)
Rematar dejando una larga hebra para coser.
Hacer un anillo mágico
1 vuelta: 5 p.b. en el anillo mágico
2 vuelta: [1 aumento] repetir hasta fin (10)
3 vuelta: 1 p.b. en cada punto (10)
Rematar dejando una larga hebra para coser.
Flash
Con el ganchillo adecuado y el hilo o lana del color del cuerpo (por ejemplo azul), tejeremos el flash de la cámara.
En el hueco dejado de 8 puntos, hacemos tres vueltas completas de p.b.
Rematar la labor dejando una hebra larga.
Cerrar el hueco del flash con una aguja de manera que quede aplanado.
Instrucciones finales
Con fieltro blanco y negro hacer dos círculo que serán el objetivo de la cámara.
Coserlos al cuerpo de la cámara o pegarlos con un pegamento para telas.
El Gallo Bermejo 2016. Todos los derechos reservados. Éste es un patrón gratuito diseñado por El Gallo Bermejo para compartir. Recuerda mencionar la fuente y por favor no lo vendas. Puedes vender productos elaborados a partir de este patrón, citando a El Gallo Bermejo como diseñador.
www.ElGalloBermejo.blogspot.com

English pattern (photo camera)
Stitches and abbreviations
Ch: chain
Sc: simple crochet
St: stitch
Sl st: Slip stitch
Inc.: increase
Dec.: decrease
Rep.: Repeat
Crochet in back loops
Crochet in front loops
Materials
Medium size yarn. We need these colours:
- White for the base and edge
- A main colour for the body and flash of the camera
Black and white felt
Crochet hook with a size suitable for the yarn size
Body of the photo camera
With white yarn and the right size hook,
Make 15 loose chains
Skip 1 chain, 1 sc only in the back loops of the next 14 chains,
Turn the work
1 sc in the front loops of the front loops we have missed previously
At this point we have 28 stitches in total and we can continue working in rounds.
Make 7 sc in the next 7 stitches (the hook is located at the middle of the body of the camera).
CHANGE TO THE MAIN COLOUR OF THE CAMERA (blue for instance)
Make 7 complete rounds (when we finish the 7 rounds we are still in the middle of the body of the camera).
CHANGE TO WHITE
Make one more round with the white yarn (sc)
Make 3 sc so there are 4 stitches to get to the edge of the camera body.
The point is to leave an 8 stitches gap where the flash of the camera will be.These 8 stitches are 4 from one side and 4 of the opposite side.
Turn the work (we are leaving the 8 st gap on the right side).
Joint the stitches in pairs with a sl st (one stitch with its opposite buddy), aproxx. 10 sl st. This way the work is finished.
Fasten off hiding the remaining thread.
Flash of the camera
With yarn with the main colour and the right size hook, we will crochet the flash of the camera.
In the 8 stitches gap we have to make 3 complete sc rounds.
Fasten off leaving a long thread.
Sew the flash so it remains closed.
Sewing and finishing instructions
With white and black felt make two circles for the camera lens. Sew the lens to the body camera or use a textile glue.
El Gallo Bermejo 2016. All rights reserved. This is a free pattern designed by El Gallo Bermejo. You can share it. Remember credit attribution and please do not sell the pattern. You can sell products made from this pattern, as long as you credit El Gallo Bermejo as designer.
www.ElGalloBermejo.blogspot.com


No hay comentarios :
Publicar un comentario
Deja un comentario, por favor, me encantará leerlo